

Big thanks to open-source libraries that made it so easy to create a chatbot. Let's jump to it.
Tech Stack
Nextjs
React
Mantine
Tailwindcss
Vercel SDK
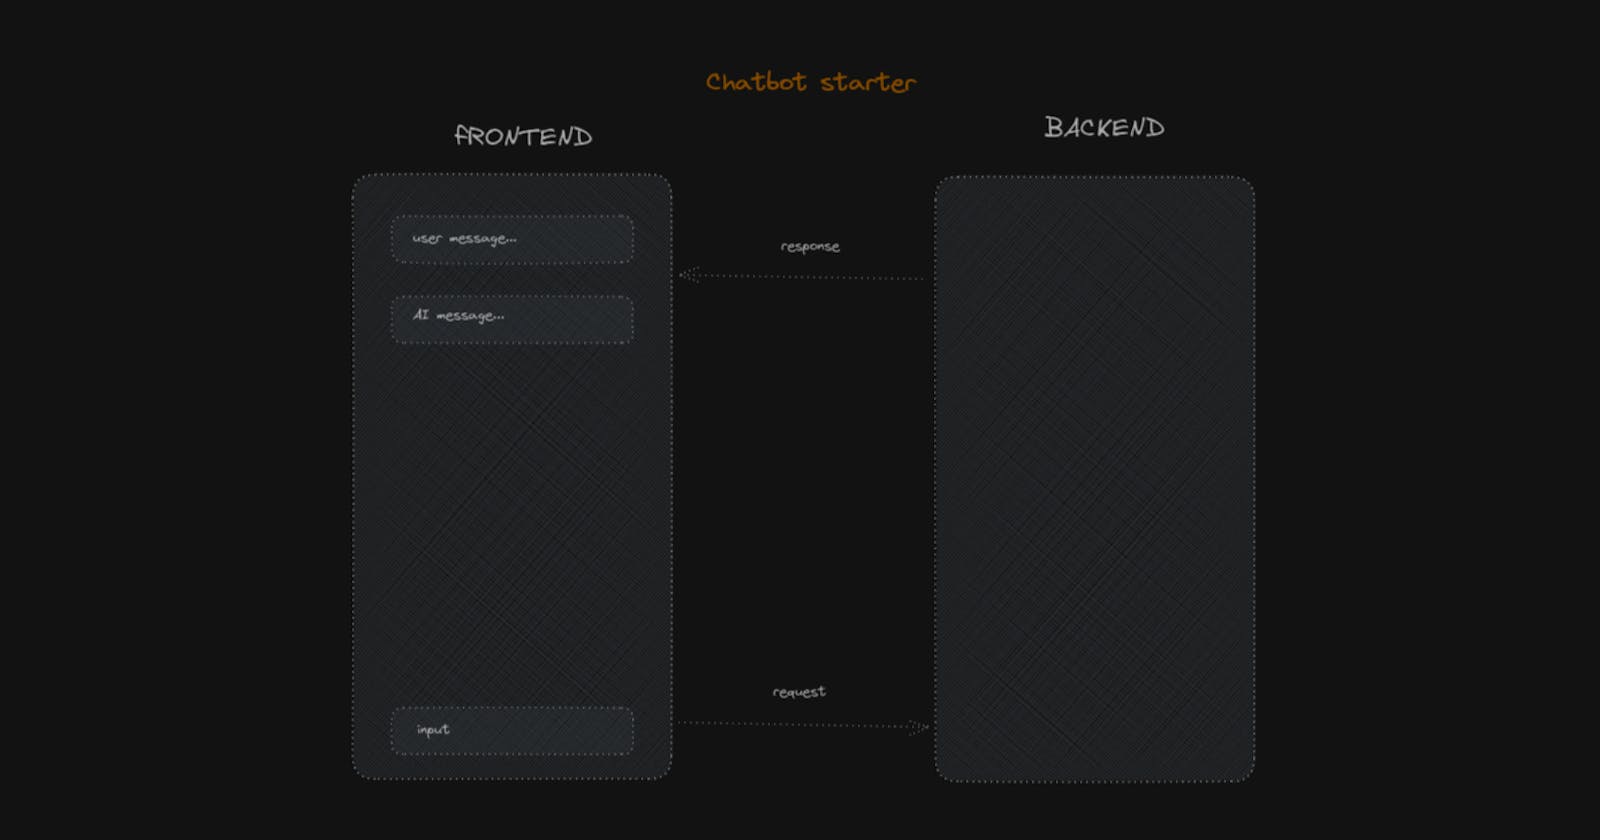
Frontend
Chats components
UserMessage: Accepts a
textprop and displays a user icon along with the text message.AiMessage: Accepts a
textprop and displays a robot icon and the text message with markdown formatting.Chats: Takes an array of
messagesand renders eitherUserMessageorAiMessagecomponents based on the role ('user' or 'ai') of each message. If there are no messages, it shows "Waiting for your message...".
import { Paper, Text } from "@mantine/core";
import { TiUser } from "react-icons/ti";
import { BsRobot } from "react-icons/bs";
import { Markdown } from "./Markdown";
import { Message } from "ai/react";
//======================================
export const UserMessage = ({ text = "" }) => {
  return (
    <div className="flex w-full items-start justify-start gap-2">
      <TiUser size="20" className="text-lime-600" />
      <Text color="dimmed">{text}</Text>{" "}
    </div>
  );
};
//======================================
export const AiMessage = ({ text = "" }) => {
  return (
    <div className="flex w-full items-start justify-start gap-2">
      <BsRobot size="20" className="text-indigo-400" />
      <Markdown content={text} />
    </div>
  );
};

//======================================
export const Chats = ({ messages }: { messages: Message[] }) => {
  return (
    <div className="w-full max-w-3xl grow py-2">
      {messages.length > 0 ? (
        <Paper p="md">
          {messages.map((o) => (
            <div key={o.id} className="border-l border-zinc-700 pl-2 mb-4">
              {o.role === "user" ? (
                <UserMessage text={o.content} />
              ) : (
                <AiMessage text={o.content} />
              )}
            </div>
          ))}
        </Paper>
      ) : (
        <div className="mx-auto pt-10 ">Waiting for your message...</div>
      )}
    </div>
  );
};
Chat page
Message Area: If the
messagesarray is empty, it displays "Waiting for your message..." centered in the div. Otherwise, it renders theChatscomponent, passingmessagesas a prop.Button Section: It contains two buttons - "Stop" and "Regenerate". The "Stop" button appears when
isLoadingis true and fires thestopfunction on click. The "Regenerate" button appears whenisLoadingis false and there are messages in the chat, and fires thereloadfunction on click.Input Area: The
PromptAreacomponent is responsible for the chat input area. It accepts four props:input: the current input value.handleInputChange: a function to handle changes in the input value.handleSubmit: a function to handle the form submission.isLoading: a boolean indicating if the chat is currently processing a message.
import { Chats, PromptArea } from "@/components";
import { AppShell, Button } from "@mantine/core";
import { type NextPage } from "next";
import Head from "next/head";
import { useChat } from "ai/react";

const Home: NextPage = () => {
  const {
    messages,
    handleSubmit,
    input,
    handleInputChange,
    isLoading,
    stop,
    reload,
  } = useChat({
    api: "api/openai",
    initialMessages: [
    ],
  });
  return (
    <>
      <Head>
        <title>Chatbot starter</title>
        <meta name="description" content="Chatbot starter" />
        <link rel="icon" href="/favicon.ico" />
      </Head>
      <AppShell padding={0}>
        <main className="flex h-full flex-col items-center justify-end py-4 ">
          <div className="h-full w-full flex-col-center">
            {messages.length === 0 ? (
              <div className="mx-auto grid place-items-center h-full">Waiting for your message...</div>
            ) : (
              <Chats messages={messages} />
            )}
            <div className="pb-2">
              <Button
                hidden={!isLoading}
                loading={isLoading}
                onClick={() => stop()}
              >
                Stop
              </Button>

              <Button
                hidden={isLoading || messages.length === 0}
                onClick={() => reload()}
              >
                Regenerate
              </Button>
            </div>
            <PromptArea
              input={input}
              handleInputChange={handleInputChange}
              handleSubmit={handleSubmit}
              isLoading={isLoading}
            />
          </div>
        </main>
      </AppShell>
    </>
  );
};
export default Home;
Backend
Setup: It imports the necessary modules and configurations, and sets the runtime to 'edge'. It also initializes the OpenAI API with the provided API key.
Handler Function: The
openaiHandlerfunction is the main function. It receives a request (req) and processes it. Themessagesare extracted from the incoming request's JSON body.Chat Completion: It then calls
openai.createChatCompletion, passing a configuration object.Streaming Response: The function then converts the response to an OpenAI stream and finally returns a new streaming text response, which can be used by the client to progressively display the generated text as it becomes available.
import { env } from '@/env.mjs'
import { OpenAIStream, StreamingTextResponse } from 'ai'
import { Configuration, OpenAIApi } from 'openai-edge'

export const runtime = 'edge'

const config = new Configuration({
    apiKey: env.OPENAI_API_KEY
})
const openai = new OpenAIApi(config)

export default async function openaiHandler(req: Request) {
    const { messages } = await req.json()

    const response = await openai.createChatCompletion({
        messages,
        // model configs
        model: 'gpt-3.5-turbo',
        stream: true,
        max_tokens: 200,
    })
    const stream = OpenAIStream(response)

    return new StreamingTextResponse(stream)
}
Share what you learned today with others.